Hey everyone, it is Brad, welcome to my recipe site. Today, we’re going to make a distinctive dish, fried chicken fingers. One of my favorites food recipes. This time, I will make it a bit unique. This will be really delicious.
In a shallow dish, combine flour, seasoned salt, red pepper flakes and black pepper. Mix with fork until well blended. In a separate shallow dish, "scramble" the eggs with the milk. Coat each tender with flour mixture, then egg mixture, then another coat of flour mixture.
Fried Chicken Fingers is one of the most favored of recent trending meals on earth. It’s simple, it’s quick, it tastes delicious. It is appreciated by millions every day. They are fine and they look fantastic. Fried Chicken Fingers is something which I have loved my whole life.
To begin with this particular recipe, we have to first prepare a few components. You can have fried chicken fingers using 13 ingredients and 6 steps. Here is how you cook that.
The ingredients needed to make Fried Chicken Fingers:
- Get 900 g chicken thighs or breasts, sliced into chicken fingers
- Prepare cumin
- Make ready paprika
- Make ready salt
- Get pepper
- Take chili powder
- Get cayenne
- Make ready 2 cups flour
- Make ready 1 heaping tsp baking powder
- Take 1 cup milk
- Make ready 1 Tbsp vinegar
- Make ready 1 egg
- Get neutral high heat oil
Pan-Fried; Breaded Chicken Fingers; Breaded Chicken Fingers. It is easy to make, but requires time to marinate. Chicken fingers is an American invention consisting of strips of white poultry meat that are coated in breadcrumbs and deep-fried in hot oil. They are often served as an appetizer or a snack, although they can be consumed as a main meal, preferably with dips such as ketchup, mayonnaise, honey mustard, or barbecue sauce on the side.
Instructions to make Fried Chicken Fingers:
- Season the strips of chicken on both sides with an adequate amount of all seasonings. Eyeball it.
- Place the seasoned chicken strips in a ziploc bag and pour in enough milk to cover the chicken. Add vinegar in the approximate ratio of 1 Tbsp vinegar to 1 cup milk. Refrigerate for at least 24 hours.
- Heat oil in a dutch oven or similar vessel to 350F.
- Mix flour with baking powder & eyeballed amount of seasonings to give the flour a reddish brown color. Place mixture into a Tupperware container.
- In batches, toss the chicken fingers in the flour mixture. Allow to cake on a wire rack, whilst scrambling an egg with your fingers in the bag of buttermilk brine. Place the chicken fingers back into the brine, and then back into the flour to toss again. Leave on wire rack for at least 30 mins.
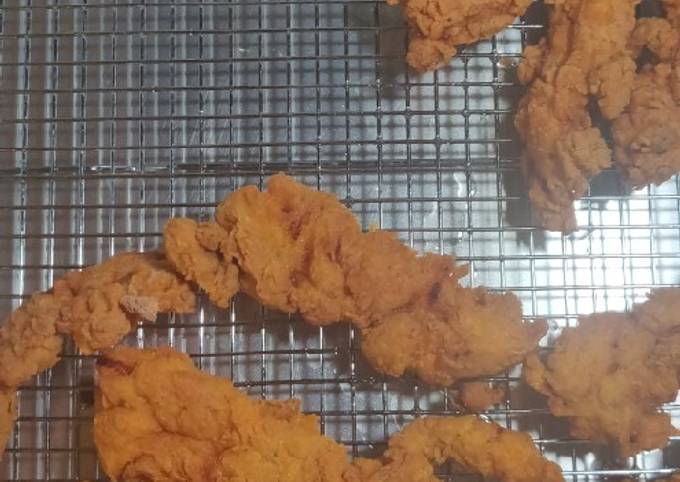
- Fry chicken in batches in 350F oil for 6-10 mins per batch or until chicken internal temp reaches 165F. Don't overcrowd the pan and let the oil temp come back up in between batches. To keep warm, let the chicken fingers rest on a wire rack on a sheet pan in the oven at 180F.
Chicken fingers is an American invention consisting of strips of white poultry meat that are coated in breadcrumbs and deep-fried in hot oil. They are often served as an appetizer or a snack, although they can be consumed as a main meal, preferably with dips such as ketchup, mayonnaise, honey mustard, or barbecue sauce on the side. My crispy fried chicken tenders don't have any buttermilk listed, but if you want to wet yours in some before you drop them in the first round of flour, you can do that. I just didn't here because I get the best crust with egg and flour. No matter what-once you get the hang of this, you can FRY ANYTHING.
So that is going to wrap this up for this exceptional food fried chicken fingers recipe. Thank you very much for reading. I am confident that you can make this at home. There is gonna be more interesting food at home recipes coming up. Don’t forget to save this page in your browser, and share it to your loved ones, friends and colleague. Thank you for reading. Go on get cooking!